There are many Windows problems, but the problem of security updates not arriving is the most important problem because it prevents you from getting security updates
It shows many errors and codes related to the problem of not updating Windows, such as
0x80240034; 0x8007000E 0x80242006, 0x80244018, 0x80D0202, 0x80246017, 0x80240438, 0x80070070, 0x8007000D, 0x80246008, 0x80096004, or 0x80070020.
Mostly all these problems are solved by following the following steps in Windows 10 and Windows 11
Solve the problem of not updating Windows 10/11
Run the Windows Update Troubleshooter
The Windows Update Troubleshooter is a tool specifically designed to fix the update process. This troubleshooter won't necessarily fix every update error, but it can fix some update issues though. Since it is a straightforward method of troubleshooting, Windows Update troubleshooting is always worth a try. This is how you can run this troubleshooter in Windows 11
Click on Start and open Settings
Select Troubleshoot on the System tab in Settings.
Then click Other Troubleshoot to view the Troubleshooting Tools
Click the Run option to troubleshoot Windows Update errors.
The Windows Update Troubleshooter will then open and detect problems automatically. Wait for the troubleshooter to perform its tasks. If you applied any fixes, it will say that it found problems and made some changes to your system.
Verify that the Windows Update service is enabled and running
Windows Update is a service that needs to be running within Windows services. The operating system cannot download and install updates when this service is not running. So, check that this service, and others needed for updates, are enabled and running when update errors occur.
Press Win + R to open the Run dialog box.
Type services in the open box.
Click OK to open Services.
Look for Windows Update in the services
Double-click Windows Update Service.
Make sure Automatic is the selected startup type option.
Check and free up drive storage space
Windows reserves special space for updates, but the full disk space may cause the problem of Windows not updating
Make sure your computer's C: drive (or primary partition) has enough space for updates. Check how much space is left on it by clicking This PC in File Explorer to view the drive's storage icon shown directly below.
If this code shows that your storage drive is more than 90 percent full, you should free up some space on it. The best way to free up drive storage space is to uninstall large software packages that you don't need. Also, perform a disk cleanup scan to clear out unwanted files.
Disable (or uninstall) third-party antivirus software
Third-party antivirus tools can sometimes interfere or conflict with Windows Update To make sure that third-party software is not causing any problems with the update, try disabling it temporarily before checking for updates in Settings. You can turn off many third-party antivirus shields by right-clicking the system tray icons and selecting the Disable or Pause context menu option.
Clean Boot
A clean boot of Windows will eliminate the possibility of startup programs and services conflicting with the update process
You can modify the clean boot settings by disabling all third-party startup programs and services. To do this, you will need to adjust some MSConfig settings as follows.
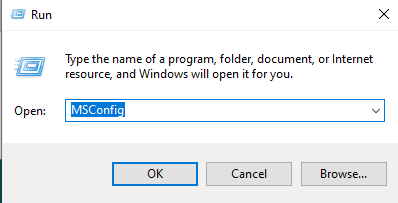
By pressing WIN + R to launch the RUN window
Then type MSCONFIG and press Enter
Clear the check box for the Load startup option However, you must select Load system services and use the original boot configuration options there.
Go to the Services tab
In the box below select Hide all Microsoft services Hide all Microsoft services on the Services tab shown directly below.
Click Disable all to remove all third-party services listed from startup.
Hit the Apply button, and click OK to exit MSConfig.
Select Restart in the dialog that will open after closing MSConfig.
After restarting Windows, try to do the update and see if the problem of not updating Windows has been resolved or is it still continuing
Run a system file check
Windows update errors can appear due to corrupted system files. System File Checker is one of the best tools included in Windows 11 for repairing system files. The command line utility will check the integrity of system files and replace damaged files. You can perform an SFC scan using Command Prompt
From the Windows search menu, type cmd and open it in Admin mode
Then type the following command
DISM.exe /Online /Cleanup-image /Restorehealth
Leave until finished Then type the following command
sfc /scannow
After the system files have been checked and repaired, you can now test whether the problem of Windows not updating has been resolved or is it still continuing
Clear Windows Update Cache
If the above steps do not resolve the Windows Update Not Resolved issue, you can manually clear the Windows Update cache to fix Windows download issues (basically, updating Windows files stored in a folder called “software distribution”). The update failed to download and install.) We are in the process of clearing the inside update cache files stored within the Software Distribution/Update. So that next time the following windows will download the recent update files and install the windows updates successfully.
Before clearing the cache , you will need to stop Windows Update and its associated services. To do this, from the search button, press "Win + q", search for "services" and open it as administrator. Find the "Windows Update" service, right-click on it and select the "Stop" option. Do the same with Background Intelligent Transfer Service (BITS)
To clear the temporary memory
Press "Win + R" to open the run menu and then type
C:\Windows\SoftwareDistribution\
and press the Enter button.
This folder contains all files related to Windows updates.
Open the "Download" folder, select all files and delete all files.
You can copy the command and put it in the run command box
C:\Windows\SoftwareDistribution\
Next, you need to restart Windows Update. To do this, open Services again and start Windows Update Background Intelligent Transfer Service (BITS)
To start the service, right-click on it and select the "Start" option in the context menu.
Reset Windows Update Components
Often the problem of not updating Windows is due to damage to the components responsible for Windows Update
Resetting these components is another potential solution to many update issues. You can update Windows Update components by renaming the SoftwareDistribution and catroot2 folders.
Open a command prompt as administrator by clicking on the start menu and then typing cmd
Enter these four separate commands, copy the command, and then right-click inside the command prompt. The command will be pasted
net stop bits
net stop wuauserv
net stop appidsvc
net stop cryptsvc
To rename the SoftwareDistribution folder, enter this command and hit Enter:
Ren %systemroot%\SoftwareDistribution SoftwareDistribution.old
Then enter this command to rename catroot2 and hit Return :
Ren %systemroot%\System32\catroot2 catroot2.old
To restart the services, enter these commands separately like the previous step
net start bits
net start wuauserv
net start appidsvc
net start cryptsvc
Windows will prepare new SoftwareDistribution and catroot2 folders for Windows Update when renamed as shown above. The net stop and start commands restart the services needed to update the platform
Now restart Windows and try again to update Windows
Update Windows with Microsoft Update Tool
If all the previous steps fail, we will only have one last step, which is the manual update by downloading the special update tool
Microsoft media creation tool
You can download the Windows 10 update tool from hereYou can download the Windows 11 update utility from here


0 Comments